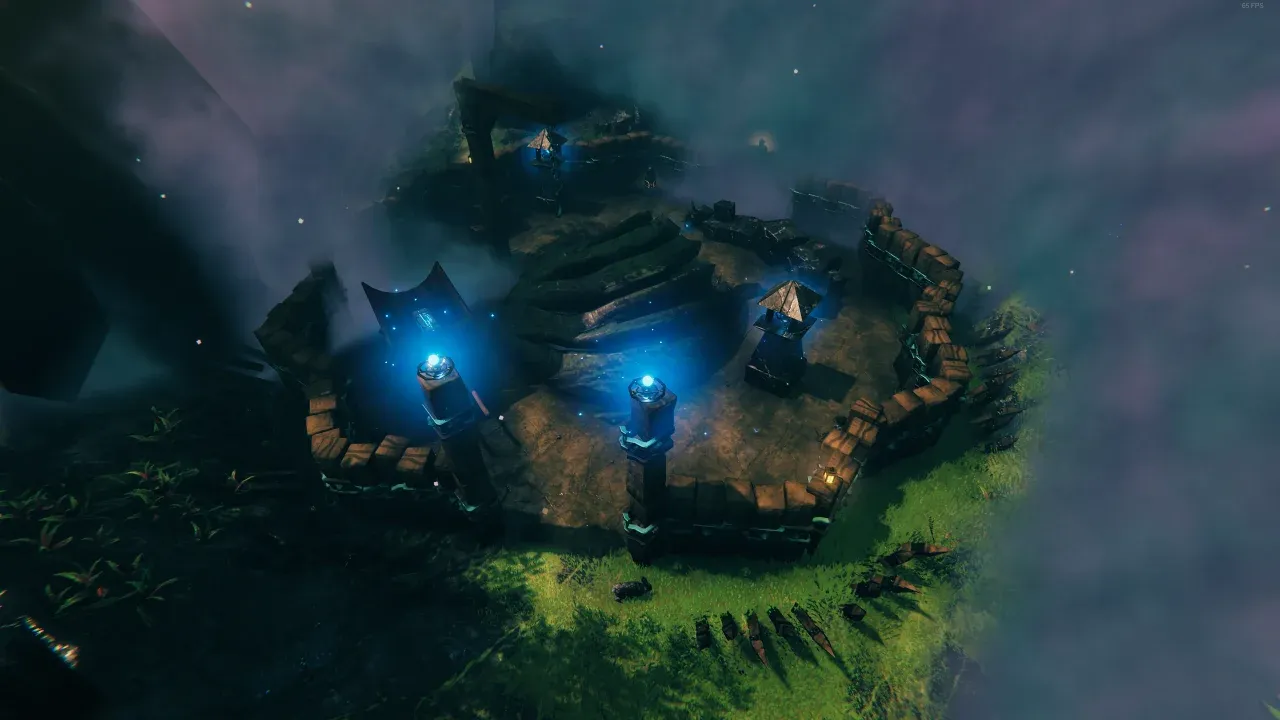
The Dvergr talk to you. They greet you when you walk up, they grumble that the Seekers smashed their black cores, and somewhere in a lit outpost a mage is muttering "I swear we had a spare Extractor here somewhere…" — which is exactly your problem, because you need what is in his crate. The Dvergr extractor is the one item in the entire Mistlands tier that no other source in Valheim will hand you, and the Queen sits at the far end of a chain that begins with it. So the question every player eventually asks, usually while lining up a shot at a neutral dwarf, is whether the Mistlands can be finished without killing any of them.
It can, and the reason is a piece of bookkeeping rather than a moral concession. Valheim does not care what you intended; it records what dealt the damage. A Ward turns an outpost's every wall, crate and wagon into property that flips the whole camp permanently hostile the instant a player damages it — and does nothing at all when the identical object is smashed by something that is not a player. That single rule, applied twice, is the whole route: once to the Ward, once to the crate.
The trap is the advice you will find first. Nearly every thread on the subject tells you to drop refined eitr beside the crate and let its sparks do the work, which is true, elegant, and completely useless to you right now, for a reason buried three recipes deep that nobody repeating the advice seems to have followed up. What follows is written against stable 0.221.12: the tool that actually works on your first extractor, the buildings that genuinely contain a crate, and the five ordinary, un-aggressive-looking actions that cost people the outpost in one click.
Only One Thing in the Mistlands Is Locked Behind the Dvergr
The honest way to answer the question is to stop thinking about the biome and start reading the receipts. Write out everything the Mistlands tier actually asks you to build — the three crafting stations, the key that opens the boss, the gear that keeps you alive while you fetch it all — and then check each line for who supplies it. Most of the list turns out to have nothing to do with the Dvergr at all.

| What the tier needs | Where it comes from | Dvergr required? |
|---|---|---|
| Black cores (15 — five each for the Black forge, Eitr refinery and Galdr table) | Infested Mines, which are Seeker dungeons: Seekers, broods, soldiers and Ticks, and no Dvergr | No |
| Sealbreaker fragments | Infested Mines, same trip | No |
| Black marble | Giant remains — around 387 per skull and 396 per ribcage — plus Dvergr viaduct pillars at roughly 150 apiece | No |
| Yggdrasil wood | Yggdrasil shoots, once you carry a Black metal axe | No |
| Soft tissue | The brain node inside a Giant skull: 118 sub-nodes averaging about 59 soft tissue if you mine the whole thing | No |
| Carapace, mandible, royal jelly | Seekers, seeker soldiers, seeker broods and the mines | No |
| Hare meat, scale hide, magecap, jotun puffs | Hares and Mistlands flora | No |
| Sap | An Ancient Root — but only through a Sap extractor | Yes. One Dvergr extractor, and there is no second supplier. |
Two rows deserve a footnote before the last one gets your full attention. The Infested Mines are generous but wildly uneven: a mine runs anywhere from 16 to 96 rooms and holds 0 or more black cores, usually at least two, and it is not uncommon to clear an entire mine and find none. Budget several mines rather than one, and note that the same trip banks your Sealbreaker fragments. The viaducts, meanwhile, are the quiet bargain of the biome — the Dvergr built them, but every viaduct in the world generates already ruined and unwarded, and a single pillar hands over about 150 black marble along with 48 iron and 8 copper scrap. Nobody is home to object. Black metal you already have, or you don't, and either way that is Plains work you finished before you arrived.
Which leaves sap, and sap is the wall. A Sap extractor costs 10 Yggdrasil wood, 5 Black metal and 1 Dvergr extractor, and that extractor exists in exactly one place in Valheim: inside a Dvergr component crate, in an inhabited Dvergr settlement. Breaking the crate is the only way to get one, and each crate drops precisely one. There is no ore for it, no dungeon chest that coughs one up, no recipe, no substitute.
Now follow the line forward, because the tempting reply is "fine, I'll skip the sap." You can't. The Sealbreaker — the thing that opens the door the Queen is behind — is crafted at a Galdr table, and a Galdr table cannot be built without 5 Refined eitr. Refined eitr comes out of an Eitr refinery. The refinery burns sap. The sap comes from the extractor you were about to skip. No extractor, no sap; no sap, no refined eitr; no refined eitr, no Galdr table; no Galdr table, no Sealbreaker; no Sealbreaker, no Queen. The Black forge is the one Mistlands station that asks for nothing Dvergr at all — 10 Black marble, 10 Yggdrasil wood, 5 Black core — which is why you can kit yourself out in carapace armour and swing a Mistwalker without ever walking into an outpost, and precisely why the wall, when you hit it, is a single wooden box rather than a whole faction. (All of this is the 0.221.12 build, the newest stable patch on record; Valheim 1.0 and the Deep North are dated 9 September 2026 and have not shipped.)
That is what the "pacifist Mistlands" question really amounts to, and it is a much smaller question than it sounds. You are not trying to route an entire tier around a hostile race. You are trying to open one crate. Everything else — the cores, the fragments, the marble, the wood, the tissue, the food, the armour — comes off Giant bones, out of Seeker dungeons, off unowned roots and shoots, or out of structures the Dvergr abandoned so long ago that the Seekers have moved in. Plan your Mistlands campaign that way: mines and Giant remains and viaducts for the bulk of it, and one deliberate, well-scouted visit to a settlement that still has residents in it.
So the shortest possible version of the plan is to walk into that settlement and break the box. The reason that does not work — and the reason this article is longer than one paragraph — is that the box is sitting inside something whose entire job is deciding who gets blamed.
The Ward Rule: Valheim Blames Whoever Dealt the Damage
Every inhabited Dvergr settlement has one somewhere in it, and the sources locate it by where it stands rather than by what it looks like: next to a crate on the ground at an Excavation Site, sitting among the furniture on a Lighthouse's lower floor, hanging under the hook and chain of a Harbor's crane. It reads like a keep-out sign, and that is the wrong way to think about it. A Ward does not make anything unbreakable and it does not make the outpost off-limits. What it does is decide, every time something in the camp takes a hit, whether the residents hold you responsible for it. Everything below sorts into three buckets on that one question — what you can take by hand, what something else can break for you, and what you must not touch while the stone is standing — and the rest of this section is largely about which bucket the awkward cases fall into.
The rule itself is short enough to memorise, and Valheim states it the same way on the rogue page, the mage page, the crate pages and all four structure pages — which is how you know it is one system rather than seven local behaviours. Damage dealt directly by a player to a Dvergr, to another Dvergr near them, or to any structure protected by a Dvergr Ward instantly turns all Dvergr in the immediate vicinity aggressive. The converse is stated just as plainly, and it is the half that matters to you: if the same object is damaged by something that is not a player, the Dvergr do not become hostile towards you at all. There is no wounded-property check, no proximity check on you, no "you were standing right there" clause. The game logs a damage source and asks one question about it.
Put a single object through both branches and the size of the gap becomes obvious. Walk up to a component crate with a black metal axe and take one swing. The crate has 10 durability and a black metal axe carries 60 chop, the crate is specifically weak to chop, and it pops open on the spot and drops the extractor — and every Dvergr in that outpost is now permanently your enemy, including the ones who were greeting you thirty seconds ago. Now run the same crate again, in the same camp, with the same wood splintering the same way, except that the thing which cracked it was not you. Nobody turns. Nobody says anything. The extractor lies on the ground and you pick it up by hand, and the rogue standing four metres away goes on complaining about Seekers. Identical crate, identical destruction, identical loot — and the only variable that changed was the answer to who swung.
That permanence is worth sitting with, because it is the reason this is a mechanic to plan around rather than a mistake to recover from. Hostility, once triggered, does not wear off. No source describes a decay timer, an apology, a cooldown or any behaviour that walks it back, and the strategies page's word for it is simply "permanently". As for how far it spreads, the game's own wording is "all Dvergr in the immediate vicinity" — nobody has published a radius for that, so treat it as "everyone who can plausibly hear it" and do not gamble on a dwarf on the far side of the camp staying friendly.
What the Ward covers is broader than most players assume. It is not the crate that is protected — it is the structure, and that means the walls, the black marble, the wagon, the stakes, the furniture, and the Dvergr themselves. There is no separate list of valuables. Anything inside is property, and property is what the attribution rule is written about.
The Ward also does two things that have nothing to do with hostility, and both of them shape the order you have to do things in. First, it blocks player building inside the outpost; the crate page notes that breaking the Ward "will allow the player to build inside/around the Dvergr base", which is only meaningful if you could not before. Second — and this one is an inference rather than a documented Dvergr-specific line — Wards lock doors within their influence as a general rule, and Guard Towers and Lighthouses both have Dvergr doors on them. Nothing states outright that a Dvergr Ward locks a Dvergr door, but the mechanic and the doors both exist, and players report exactly that behaviour. Plan for a crate behind a closed Dvergr door being out of reach while the Ward is up.
Here is where you should be suspicious of any guide that gives you numbers. The Dvergr Ward is a different object from the one you can build. Yours is guard_stone; theirs is a non-craftable variant, guard_stone_test, and its radius and durability are not documented anywhere. The player's Ward is fully specified — 1,000 durability, a 32 metre protection radius, immune to chop, pickaxe, poison and spirit, neutral to blunt, fire and lightning, and its in-game job is to stop other players building and opening doors and chests, not to make anything invulnerable. None of those figures belong to the Dvergr stone, and anyone quoting you "32 metres" or "1,000 HP" for a Dvergr outpost has silently copied one prefab's stat block onto another. What the structure pages do say, consistently, is that the Dvergr Ward "protects the entire structure". Take the whole camp as covered and stop there.
Once the Ward is gone, players consistently report that the rule collapses to its simplest form: the Dvergr only aggro on direct attacks against themselves, and crates and chests become free to break by hand. That is community-reported rather than documented — no wiki page states it — but it is exactly what you would expect from a rule whose trigger clause is "protected by a Dvergr Ward". Treat it as reliable-but-untested, and do not use it as your first plan for the Ward itself.
And then there is the part that costs you nothing at all. Picking things up is not damage. Dvergr lanterns and tankards are pickables — you interact with them, no object breaks, and the lantern page says outright that they can be taken from Dvergr buildings without becoming their enemy. A Lighthouse's lower floor carries up to three lanterns; an Excavation Site's walls carry up to six. You can walk into an inhabited outpost with the Ward fully intact, lift every lantern off the wall and the tankard off the table, and walk out with the residents still calling you a guest. The lantern is a permanent one-handed light with no durability at all, at the cost of 5% movement speed — a genuinely good pickup, and free.
Not everyone agrees about that, and the disagreement is real rather than a wiki typo. The Progression guide's Mistlands section describes the Dvergr as attacking you if you attack them first "or if you anger them by stealing from their homes". The Dvergr lantern page says the opposite in so many words, and two independent player reports say the same about looting after something else broke a container. The specific pages are the stronger evidence here — a page about the exact item beats a walkthrough's summary prose, and the likeliest reading is that "stealing" is loose phrasing for "smashing their crates" — but nothing adjudicates it, so it stays open. Take the lanterns if you want them; just do it before you have anything else at stake, not after.
Two footnotes on who the rule applies to. Haldor and Hildir are Dvergr and are not part of this at all — they cannot be angered or damaged, and they never leave their set pieces, so nothing you do around them counts. And the Ashlands Redbeards, added in 0.218.15, carry the same Dvergr faction tag and a word-for-word identical provocation sentence, which tells you the Ward rule is a cross-biome system rather than a Mistlands quirk. They are a separate clan, though, and whether hostility earned in the Mistlands follows you to their outposts is untested and unsourced. Assume nothing either way.
So before you touch anything in an outpost, sort the action into one of three buckets. Pick it up — lanterns, tankards, a dropped extractor — always safe. Let something that is not you break it — safe, and the whole basis of the route. Break it yourself — that outpost is over, permanently, for every Dvergr who can hear it. Not the run, though. Hostility stays with the Dvergr who heard it, and every other inhabited Guard Tower and every Lighthouse in the world still has a crate of its own — so if it fires, the recovery is to stop dealing damage altogether: put the tool away, break contact instead of fighting back, and walk to the next tower. Two things stay genuinely unknown: how big the Ward's ring actually is, and whether taking pickables counts as the "stealing" that one source warns about. Both are cheap to be conservative about. Assume the ring is bigger than it looks, and do your looting early.
Which leaves you with an obvious problem. The one thing you came for sits in a box that only breaks when it is hit, and you are the one player character in the world who cannot be the one hitting it. Something else has to swing — and the Mistlands offers exactly three candidates for that job, which are nothing like equally useful.
Three Things Can Break the Crate for You — Only One Works on Day One
The Mistlands supplies three of them, and every guide you will read lists all three in the same breath, as if they were interchangeable. A cart, pushed by you but credited to itself. The biome's own monsters — Seekers, Seeker soldiers, a passing Gjall — chewing through a settlement while the Dvergr fight back. And refined eitr, dropped on the ground to spit sparks at whatever is next to it. All three are genuinely non-player damage, all three are documented as leaving the residents calm, and exactly one of them is something you can act on today.
Start with the cart, because it is the only one you can aim. The mechanic is plain: a cart both deals and receives up to 20 blunt damage when it rams a creature, a structure or the terrain at speed, the damage scales linearly with impact speed from 3 m/s to 5 m/s, and ramming is checked every half second. That speed floor is the whole discipline of the technique — a cart nudged at walking pace does nothing whatsoever, and a cart at a genuine run is carrying a weapon's worth of blunt into whatever it hits. And the game books that blunt to the cart. The crate page states the procedure in as many words: ram the Ward with a cart until it breaks, and because the cart is causing the damage, this does not anger the Dvergr — after which the base becomes buildable, which is the second half of the trick and the reason the ordering later on is forced. Players describe doing exactly this to the extractor box too, running the cart into it over and over "which also does not aggro the dvergar." Valheim has a whole Ashlands siege vehicle — the Battering Ram — built on the same idea of letting the machine own the damage; you do not need it here, and siege theory belongs in its own guide.
Against the crate, the arithmetic is short. You already know it holds ten durability. A cart delivers twenty blunt on a good impact — one solid hit, provided you actually got speed on it. Against the Ward, there is no arithmetic, and you should be suspicious of anyone who offers you some. The Dvergr stone is a separate, non-craftable prefab and nobody has published its durability, so nobody — this article emphatically included — can tell you how many rams it takes. Two? Nine? The honest instruction is ram it until it breaks, and to expect the cart to take punishment while you find out, since it receives as much on impact as it delivers.
One more thing to be straight about: the provenance of this trick. The note documenting it carries the stamp "as of 9/9/24," which is an editor's dated observation on a community wiki, not a patch note and not a statement from Iron Gate. What can be checked is the stable changelog, and sweeping it for ward, cart, dvergr, crate and extractor turns up nothing that touches cart attribution or Ward hostility anywhere between 0.213.4 and 0.221.12. So the correct claim is the modest one: no stable patch since has changed it. That is weaker than a developer confirmation, and it is the strongest thing anyone can honestly say.
Now the monsters, which are real and which you should not build a trip around. The Dvergr are naturally hostile to the biome's aggressive creatures and attack them on sight, so the war happens with or without you, and over time most Dvergr settlements are overrun by attacking Seekers. Players have watched it pay off exactly as advertised — "the mage will level half the tower and most likely the component crate as well." But read the wiki's caveat rather than its headline: settlements get overrun "especially where the settlement does not have any Dvergr mages." That clause is the entire practical difference between a plan and a wish. A support mage heals every ally within 4.32 metres for 400 health every half second across four seconds, on a ten-second cooldown — and, on a separate and much slower cycle with a wider reach, buffs the whole camp with +20% to all skills. Eight heal ticks of four hundred, over and over, is not a settlement losing a war of attrition. It is a settlement winning one. At a maged outpost, waiting is not slow — it is a bet the residents mostly collect on.
The damage types decide the rest, and they cut in an awkward direction. A Seeker soldier's ram and ground slam carry tier-4 chop and tier-4 pickaxe alongside their blunt — its bite carries neither — which is why a soldier smashes black marble deposits, Yggdrasil shoots and Ancient swords that you would need a black metal tool to touch. Chop is precisely what the component crate is weak to, so a rampaging soldier is a superb crate-breaker. The Ward is the opposite problem. The only Ward stat block anyone has published is the player's, which is immune to chop and pickaxe and merely neutral to blunt — and as established, those numbers are not the Dvergr stone's to borrow. Even read as nothing more than a hint, it points the same way: the soldier's signature damage types are the ones a Ward shrugs off, and only its blunt component would be doing any work at all. So the likely shape of a successful rampage is a broken crate in a camp that still has its Ward — fine if that crate sat in the open at an Excavation Site, worthless if it sat behind a Dvergr door the Ward is still holding shut.
A Gjall is a different profile and no more schedulable. It spits two fireballs of 50–100 blunt and 80–160 fire every six seconds from six to thirty metres out, announces itself with an unmistakable sound and an orange cast in the surrounding mist, and can be outrun with enough stamina. Nothing in that outpost is documented immune to either of those damage types, so a Gjall genuinely can flatten what a soldier cannot. It is also weather. It arrives when it arrives, aims where it aims, and is just as happy to level the building you wanted intact.
Which leaves the method everyone recommends first. Thrown on the ground, refined eitr emits occasional sparks dealing 30 poison and 30 lightning, and the wiki spells out the application: drop several near Dvergr component crates and let the sparks destroy them, without angering the nearby Dvergr even with a Ward present; or point the same sparks at the Ward itself. Players report needing a stack of about ten, tossed one at a time so each lands hard against the box, plus patience. The crate is documented poison-immune, and the published Ward profile lists poison immunity too, so on both counts it is the lightning half doing all the work. Honestly, it is the best tool described anywhere in this article — no run-up, no physics, no line of approach, and it works perfectly well on a crate sitting on top of a wagon where a cart can never reach.
Then read the recipes backwards. Refined eitr is made in an Eitr refinery, from one sap and one soft tissue. Sap comes out of a Sap extractor, which is placed on an Ancient Root and built, among other things, from one Dvergr extractor — and the refinery will not even go up without three sap already in hand. Follow that chain to its end and it closes on itself: to make the eitr that opens the crate, you need the extractor that is inside the crate. No source anywhere states this outright. It falls out of four recipe pages read together, and the wiki concedes it without noticing, in its own sentence — you drop refined eitr near component crates to claim more extractors. More. That word only parses if you already have one.
So the three candidates are not three options. They are one tool, one lucky break and one reward. Pick the cart on purpose rather than by default — it is buildable now, it is aimable, it is repeatable, and its damage belongs to it and not to you. If you happen to walk up on a mageless outpost the Seekers have already gutted, take the gift and the free drop; if there is a mage in there, stop camping it, because you are waiting on a fight the healer is winning. And file the eitr method away rather than burning a trip on it: it was never a way in, it is what you spend once you are already inside the loop, and it will make every crate after this one nearly free.
That settles the tool. It does not settle where to point it — because a cart needs a target, and a good number of the Dvergr buildings on your map have never had a component crate in them at all.
Which Dvergr Structures Actually Hold a Component Crate
The Mistlands is generous with Dvergr architecture and stingy with component crates, and the sorting rule that separates the two is whether anybody still lives in the building. The race's structure list runs to Guard Towers, Lighthouses, Excavation Sites, Harbors and viaducts, plus the mines and the Citadel they walked away from long ago — and roughly half of those types can generate ruined. A ruined Dvergr structure holds no Dvergr, no Ward, few of the biome's uncommon resources, and groups of Seekers where the residents used to be. It also holds no component crate. Not a rare one, not a chance at one: the crate is part of the Dvergr furnishing set, and ruined variants keep none of that furniture. The extractor hunt is the occupied-building hunt, and a fair share of the shapes looming at you out of the mist are the wrong shapes.

Two types are guaranteed. Guard Towers are described as one of the more common Dvergr structures, and every inhabited Guard Tower contains a component crate. Lighthouses go one better: they never generate ruined at all, and each one contains exactly one crate. That makes a Lighthouse the only building in the biome where identifying it is the same act as confirming a crate. The catch is where the crate sits. A Lighthouse keeps its Ward, its furniture, its beds and table and lanterns on the lower floor, and puts the component crate on the upper floor, reached by a black marble staircase running up the inner wall, with no roof access from inside. Guard Towers are less specific — the crate is documented as present in every inhabited one, but not pinned to a floor in the two-storey variant, so treat the interior as something you scout rather than something you pre-plan. Both types have Dvergr doors on them, which, as established, means a crate inside is behind a closed door for as long as the Ward is standing.
Excavation Sites are the ones you can read from outside. The camp is Dvergr wood walls and a ring of sharp stakes around a pit holding partially excavated Giant remains, which the Dvergr are mining for black marble — plus a wooden wagon, stacked marble blocks, up to six lanterns on the walls, blue mist-lights, and a Ward covering the whole thing. There are three variants and the pit tells you which one you have walked up to. Variant 1 is built around a Giant skull, with the hook and chain slung from a wooden tripod, and its component crate sits on the ground inside the walls, right next to the Ward. Variant 2 is built around a ribcage, with the hook and chain on a proper crane, and its crate sits on top of the wagon. Variant 3 is the ruined one: an empty pit, a few scattered marble blocks, no Dvergr, no Ward, no component crate, and six ordinary crates with Seekers among them. Skull or ribs means residents and an extractor. An empty pit means you crossed the Mistlands for someone else's leftovers.
Harbors are a genuine coin flip. The structure is a wooden dock running out over the Ocean in one or two branches, on poles topped with blue lights, with one support extending into a crane — and the Ward hangs underneath that crane's hook and chain. Harbors are never ruined. But the crate is not on the dock. It lives in a small rectangular black marble building on the shore, and the dock often, but not always, leads straight to its doorway. When that building generated, it always contains exactly one Dvergr mage and exactly one component crate. When it did not, you have a dock, some ordinary crates, and a wasted afternoon. Nothing about the pier tells you which world you are in — you find out by looking at the shore. Harbors do have one scouting advantage, with a caveat about eye height: the mist does not lie flat on the water, and there is a clear band beneath it at surface level — an observation recorded at the waterline, from swimming, not from a deck. Approach along the coast and the biome's weather is finally working for you rather than against you; how much of that band you get from a boat is not something anyone has written down.
None of that makes ruined structures worthless — it just makes them the wrong errand. The ordinary Dvergr crates in them give 1 Finewood and 2–4 soft tissue each and there is no Ward to care what you do to them, so break them by hand. Ruined Guard Tower variant 2 has a large Yggdrasil shoot growing out of the hole where its staircase used to be. And an overrun tower is worth a trip down the stairs: one of the two Infested Mine entrance types sits in the basement of a Dvergr tower the Seekers have taken over (the other is set into a hillside behind a long black marble stairwell), and the mines are where your black cores and Sealbreaker fragments live. File a ruined structure as a resource stop and cross it off the crate list.
Which leaves the actual field problem: telling these apart before you have committed a walk to them. A Wisplight clears 10 metres of mist, a Wisp torch 12, a Mistwalker only 5 — so you are identifying buildings at roughly conversational distance, and three silhouettes get mistaken for each other constantly.
- Lighthouse — black marble with copper and wood trim, blue jute hangings, a hexagonal gate at the entrance, always exactly two storeys, and a large blue mist-dispelling light on the upper floor. That upper light is the reliable tell at distance. Never ruined; crate upstairs.
- Guard Tower — also carries blue mist-dispelling lights, but never the big one up top. One or two storeys: variant 1 is the tallest, two full storeys with blue jute on both and a wooden spiral staircase to the roof; variant 2 is single-storey with a staircase to the roof; variant 3 is single-storey with no roof access and a wooden staircase descending to an earthen-floored basement.
- Infested Mine entrance — the impostor, and it looks like Guard Tower variant 3. The tells are absences: no blue jute anywhere, no roof lamppost, and inside, a central black marble pillar with a spiral staircase running down to the dungeon. Seekers, in a building that is structurally intact rather than wrecked. No Dvergr, no Ward, no crate.
Two free navigation aids while you are looking. If you have not spoken to Hugin yet in the Mistlands, he appears when you come near Giant remains — and Giant remains are exactly what an Excavation Site is built on, so an unspent raven doubles as a camp detector. Ancient Roots also push a green glow through the mist, which makes them the other dependable landmark in a biome that hides everything else.
Pick your target on those tells and you have also picked which delivery problem you are buying. Excavation variant 1 is the friendliest thing in the biome: Ward and crate both at ground level, inside the same walls, a few paces apart. Variant 2 asks for a hit at wagon height, and the one method that does not care where a crate sits is the one already ruled out for your first extractor. A Lighthouse is the strange case — a guaranteed crate, and the hardest one to reach, because the Ward is downstairs, the crate is a flight up an internal staircase, and a ram needs speed it will not easily find on a landing. Guard Towers are door-first, floor-unknown. Harbors are worth the walk only once you can see the shore building. "Guaranteed" and "easy" are different words.
So you have a building in mind and you know which object inside it you are aiming at. The order of what happens next is not yours to choose — it is set by a rule already on the table: while that Ward stands, you cannot build a thing inside those walls.
The Two-Cart Route to the Extractor, Step by Step
That prohibition is the whole shape of the plan. Anything you need inside those walls has to be built after the Ward dies, and the thing that kills the Ward has to exist before it — which means there is no version of this where you build one cart and use it twice. You build one outside, spend it on the stone, and only then does the ground inside become legal to put a Workbench on. Two carts, two Workbenches, one door that opens in the middle. The sequence is not a preference; it is the building ban read out loud.

Name the target before the materials, because what follows is written for a crate a cart can reach: one standing on the ground with a few metres of floor in front of it. Excavation Site variant 1 is the model — Ward and crate a few paces apart inside the same walls — and a Harbor whose shore building you have already sighted is the same job indoors. An inhabited Guard Tower qualifies the moment its door opens and the crate turns out to be on the ground floor. The two placements this route cannot serve are the awkward ones already flagged: variant 2's crate sitting on top of the wagon, and a Lighthouse's crate at the head of an internal staircase where nothing will reach ramming speed. Both are guaranteed crates, and both are jobs for dropped eitr on a later trip. For a first extractor, walk to one standing on the ground.
The good news is that all of it fits through a portal. A cart costs 20 Wood and 10 Bronze nails, so two carts are 40 Wood and 20 Bronze nails, and bronze nails are the odd item in Valheim's metal economy: unlike copper, tin, or the smelted bronze they are made from, nails go through a wooden Portal, at 20 nails per Bronze ingot from a Forge. One ingot covers the trip. Add wood for the two Workbenches and your Hammer, and the entire pacifist route is a single portal hop with no boat, no metal haul, no black-metal logistics and no fight — which is a genuinely strange thing to be able to say about a Mistlands objective.
Here is the run, with the reason each step exists.
- Portal in and place your first Workbench outside the ring. Not for atmosphere — the cart is built at the Hammer, on the Misc tab, and the recipe only appears inside a Workbench's range. Outside is the only place you are allowed to put one, and it doubles as your repair bench, which you will want.
- Build cart #1 there. It has 500 durability, resists frost and pierce, and is weak to fire — the last one mattering only if a Gjall wanders past, since nothing else out here throws fire. Note that a cart cannot be deconstructed with the Hammer; it only ever ends by being destroyed. That is why you carry materials for two rather than planning to recycle one, and it is why you build it when you arrive rather than the day before: enemies attack and destroy carts they can reach, and an unattended cart parked in the mist is exactly the sort of thing a wandering Seeker will chew through while you are off scouting.
- Pick your approach lane before you touch it. Guard Towers, Lighthouses and Excavation Sites are ringed with Dvergr sharp stakes, and the stakes deal 15 Pierce and 80 knockback to any creature that touches the sharp end — you and your tames included. That is not a lethal hit; it is a hit that flings you off your line and drops your cart mid-run. The stakes also draw aggro from enemies in the vicinity, so the perimeter is where the biome's fighting tends to collect, and they are part of the warded structure, which means clearing them out of your way is not on the menu. You route around them. One useful quirk: players can stand on the middle of the stakes without taking damage — it is only the points that bite — so a stake line is footing you can cross even when it is not a lane a cart can cross. Look for the gap, the gate, or better, a slope.
- Run it into the Ward. A downhill start does the work for you: a cart obeys physics and rolls on its own if you release it on a slope, and that is free speed you do not have to spend stamina buying. Clear the speed floor from the cart's damage model or the ram does not register at all — and once it does, keep going, because nobody knows how much the Ward takes. Its durability is not documented anywhere, and any guide handing you a hit count has made one up. The instruction is genuinely ram it until it breaks — and expect to walk the cart back to that Workbench for repairs partway through, since it receives as much on impact as it delivers. If a resident is standing in your lane, walk into them: Dvergr can be shoved out of the way with your body, no damage involved. They path back and regroup, so it buys you a window, not a clearance. Take the window. Nothing documents how the game scores a cart that runs down a Dvergr, and there is no reason to find out with a Ward still standing.
- The moment the stone goes, the outpost changes state. The Dvergr doors unlock, and building becomes legal inside. This is the hinge of the entire route, and it is why the previous four steps could not have happened in any other order.
- Place Workbench #2 inside, within build range of the crate. The crate page is specific about this: a workbench in the crate's build radius is what lets you put the second cart where it needs to be.
- Build cart #2 directly in front of the crate. The obvious question is why you do not simply drag cart #1 in through the newly-unlocked door — and you could, since carts are pulled, and can even be pulled while swimming. The problem is the run-up. Twenty blunt only exists above 3 m/s, and a doorway, a staircase landing, or a floor full of Dvergr furniture rarely gives you the runway to get there. Building the cart at the target end and shoving it the last few metres is the reliable version.
- Hit it once, properly. The crate's 10 durability was never the obstacle — a cart's ram is worth double it — and Dvergr structures generate with every individual component, furniture included, already damaged by a random amount, so the box may well be sitting under 10 before you start. One clean impact, assuming you actually got speed on it. A nudge is still nothing.
- Pick the extractor up by hand. The crate broke, and it did not break because of you. As one player put it after watching a mage level half a tower and the crate with it: once it's broken they don't care if you pick it up. No warning bark, no formation, no permanently hostile camp. You walk out with the item and the residents still in it.
Then take the rest of the camp before you leave. Building is legal inside those walls now, so the Workbench you placed for the cart can be joined by a chest, a roof and a bed if you want a forward camp here. The ordinary Dvergr crates stacked around the site are yours to break by hand for their Finewood and soft tissue — allow time for it, because at 200 durability apiece they are twenty times the job the component crate was — and by every player account, with the stone gone the residents only mind attacks on themselves.
That is the whole thing — a portal, an ingot's worth of nails, two carts and a short walk, with no combat step anywhere in it and no point where you swing at anything. Which is also the uncomfortable part. The route is short enough to finish inside one trip, and every one of its steps is a thing you do near an outpost full of property that is watching who touches it. Nothing above will save you from the swing you make without thinking about it.
Five Ways to Lose a No-Kill Run in a Single Click
None of them feel like attacking anyone. That is the whole difficulty. Every way this run dies is the attribution rule firing on something you had filed under housekeeping — clearing a lane, harvesting a node, finishing off a Seeker, tidying up an object you were planning to destroy anyway. The Dvergr are not reading your intent; they are reading a damage source. So these are not five rules. They are five costumes worn by one, and the reason they are worth walking through individually is that each one hides the rule somewhere different.

- A swing at any part of the structure, with anything in your hands. The Ward covers the whole build: the marble, the wooden walls, the wagon, the furniture, the doors, the ordinary crates, the mining apparatus, the Giant remains the camp is dug into. There is no inventory of protected items, so there is nothing to memorise except all of it. And it is not a weapons rule. One player reports that demolition-hammer and power-slam damage on Dvergr structures pulls aggro just as reliably, which is exactly what you would expect from a system that logs a damage source rather than an animation. Deconstruction intent, tool tier, whether you meant to break it — none of that is in the check.
- Splash from your own attack landing on a bystander. You do not have to hit a dwarf to hit a dwarf. Area damage that clips one turns them, and the most-quoted version of this is a player who was on the Dvergr's side at the time: "You try to help them and they take a bit of splash damage and they turn on you." What makes it nastier than it sounds is that the camp's population is not fixed. Beyond the residents standing at their fixed spawn points, Dvergr wander the biome in groups of one or two, and rogues can spawn and respawn anywhere in the Mistlands — so the bystander in your blast radius may be someone who was not there when you lined the shot up.
- A shot at a Seeker that lands on a wall. This is the one that punishes doing the obviously right thing. Something hostile comes at the outpost, the residents move to meet it, you help — and your fireball, your bomb, your arrow goes wide by a metre and detonates against warded marble. The Seeker's damage to that same wall would have cost you nothing at all. Yours costs you the camp. The asymmetry is not about the wall; it is about whose name is on the hit, which means fighting next to an outpost carries a risk that fighting anywhere else in the biome does not.
- A weapon on the Ward instead of a cart. The cruelty here is that the Ward is the one object in the outpost you actively intend to destroy, and it is the single worst thing to touch by hand. It sits in a camp full of loose scenery — next to a crate on the ground at an Excavation Site, among the furniture on a Lighthouse floor, dangling under a Harbor's hook and chain — and one impatient swing at it while you wait for a cart to be repaired costs you the whole camp over the exact object your entire plan was built around destroying. The cart is not a stylistic choice. It is the reason the same demolition is legal.
- Chopping or mining inside the ring while the Ward is up — and here the evidence genuinely splits. One player reports that the Ward protects trees inside its radius, and that cutting an Yggdrasil tree within the ring aggroed the camp, explaining it as the tree being inside the non-aggression zone and therefore theirs. Another states the opposite from their own play: you can cut trees and break rocks inside the radius fine, and it is mining the marble structures that pulls aggro. Neither is a wiki page and nothing adjudicates between them. The tidy theory that would reconcile them — Dvergr-placed objects are owned, world-generated scenery is not — is nobody's verified finding, and the next paragraph is a good reason to distrust it.
Because the sharpest data point on the whole subject is a Giant skull. Excavation Site variant 1 is built around one, and that skull is not decoration: the brain node inside it is the soft tissue your Eitr refinery is eventually going to eat, which makes it the single most tempting thing in the camp to put a pickaxe into while you are already standing there. A player did exactly that, with the Ward still up, and reported the result in seven words that should be printed on every Mistlands guide: "So I hit the skull with pickaxe. Barely escaped. So it counts as property." The wiki says the same thing in flatter language — damage to any part of the structure, even the Giant remains, instantly angers every nearby Dvergr. So the object that looks most like unowned terrain, that predates the camp by an age, that you break with a mining tool rather than a weapon, is documented warded property. That is why "it was here before they were" is not a test you can use, and why the ordering is not negotiable: Ward first with the cart, skull second. Do it in that order and the same pickaxe swing that would have cost you the outpost is just mining. Reverse it and you have lost the extractor and the soft tissue in one motion.
The game does at least talk to you first. The Dvergr have three dispositions, and the middle one exists specifically for this: past the neutral chatter about Seekers and lost mines, before hostility, sits a dedicated private area alarm voice set. "I wouldn't do that if I were you." "Keep your hands to yourself!" "We're only good hosts as long as you're a good guest." "You're on thin ice." One player who went after a Ward describes getting warnings before the camp actually turned. Past that is the aggravated set — "Dvergr, to me!", "We warned you!" — and by the time you hear those it is not a warning, it is a scoreboard. Treat an alarm line as a hard stop: freeze where you are, put the tool away, and work out what you last touched, because something in the last few seconds registered. But do not budget for it. The rule as written says player damage to warded property turns them hostile instantly, and nothing documents what actually triggers the alarm tier or guarantees it fires before the flip. It is a courtesy, not a grace period.
Which is why the useful takeaway is not a list of five things to remember under pressure. It is one line, and it happens to make the disputed cases irrelevant: while the Ward is standing, nothing inside the ring gets touched by a weapon or a tool. Not the walls, not the marble, not the furniture, not the skull, not a tree, not a rock, not the Ward, not a Seeker standing in front of any of them. Everything you actually want in there — the lanterns, the tankard, and eventually the extractor — you take with your hands, and the only thing you break, you break by proxy. Adopt that and you never need to know whether the tree report or the rock report was right, because you were never going to swing at either one.
Get all of that right and you walk out with the extractor and leave a camp that still has its lights on, its residents complaining about Seekers, and its mage still muttering about a spare extractor he cannot find. Which is worth being honest about: refusing the easy option is a purchase, not a freebie. Somebody should say what it actually costs you, and whether anything you gave up is gone for good.
What Zero Kills Costs You, and the One Thing It Locks Out
The invoice is short enough to read off a drop table. A Dvergr — rogue or mage, they share one — carries 2 to 14 coins, black marble half the time, soft tissue a quarter of the time, and a Dvergr trophy 5% of the time. Four lines. That is the entire price of the run, multiplied by however many residents you walked past on your way to the crate. It is worth going through them one at a time, because three of the four are the kind of loss you can only notice by looking for it.
Coins you can dismiss outright. They buy Haldor's stock and nothing else, and the Infested Mines you are already clearing for black cores and Sealbreaker fragments hand them over in piles averaging around 138 — one pile is roughly ten dead Dvergr at the luckiest end of that 2–14 roll, sitting on the floor of a dungeon with no Ward and no witnesses. Black marble is worse value still. The 50% roll drops an amount nobody has bothered to publish, and the camp you are standing in is built around a partially excavated Giant — the ribcage or skull in that pit is the reason the Dvergr set up there in the first place. One node in one pit beats the corpses of everyone who was guarding it, and there are viaducts lying ruined and unowned across the biome doing the same job. Soft tissue repeats the pattern: a single skull's brain node outweighs a one-in-four roll per body many times over, and the ordinary Dvergr crates give two to four apiece once something that isn't you has opened them. Every one of those three lines is replaced by a stop you were making anyway.
Then there is the fourth line, and it does not have a substitute. The Dvergr trophy is a 5% drop from rogues and from mages — currently the only trophy in Valheim that comes off two different creature types — and it is what you use to program a Ballista. There is no crafting recipe for it, no chest that holds one, no pickable version sitting on a Dvergr table next to the tankard. It exists only as something a dead Dvergr leaves behind, at one roll in twenty per body — and nobody has published what that works out to in practice, because a 5% roll is a chance, not a quota. If you want a programmed Ballista, or a complete trophy wall, the honest answer to can you complete the Mistlands without killing Dvergr is not quite — and that is the only place where it is not quite.
Be clear about what a kill subtracts, though, because the two Dvergr you can kill are not the same purchase. Rogues respawn. They spawn and respawn anywhere in the middle of the Mistlands during the day, so a rogue you kill is a rogue the biome eventually replaces. Mages do not. They are found only around settlements and structures, almost always in groups, at fixed spawn points, and nothing in the game puts another one there. A mage you kill is gone from that world for good — and with them goes the heal and the +20% buff that was the reason that outpost was still holding its ground against the Seekers at all. The wiki's own line is that settlements get overrun especially where they have no Dvergr mages. So killing the mage is not a one-off transaction with a corpse; it is the moment you decide the camp comes down eventually, on someone else's schedule. An outpost stripped of its healer stays stripped for the life of the world.
Which brings up the trick somebody always raises at this point, and it needs naming so you can put it down. The strategies page suggests tossing refined eitr — or a pufferfish — to land next to a dwarf rather than next to a crate, so that it gradually kills the Dvergr without the rest of them turning on you. It is real advice and it is not this article's advice, for two reasons. The first is definitional: it is a kill, with the blame filed off. It hands you the trophy, and it hands you the dead mage above, and a run that uses it is not a pacifist run — it is the same outcome with better paperwork. The second is that the sourcing is thin. The claim lives on one strategies page and one forum thread; the Pufferfish page itself documents a passive fish caught with misty bait that poisons you if you get too close, and says nothing anywhere about throwing one as a weapon. Treat the pufferfish half as unverified, and the whole idea as out of scope. The straightforward alternative is out of scope too, but at least it is documented: 1-star and especially 2-star mages are the biggest threat in the biome and 2-star rogues hit hard, which is the fight this entire route exists to walk around.
So the decision is a price, not a principle. Stay at zero and you keep a settlement with its lights on, its lanterns already in your pack, its mage still healing, and its crate already looted — and you give up coins you can find on a dungeon floor, marble you can chip out of the pit in front of you, tissue you can mine from a skull, and one trophy. Decide a Ballista matters more and you take one deliberate exception, made on purpose rather than by reflex, and made on a rogue if you have the choice, because that is the one Valheim puts back. What you cannot do is have both. There is no non-lethal version of that trophy, and the game knows exactly what it is selling you: the item's own description reads, "It's frankly a little troubling that you would consider hanging these on your wall…"
Price agreed, then, and the extractor is in your inventory. One job left — turning a single piece of Dvergr hardware into a Sealbreaker without going back on the deal.
From One Extractor to the Queen, With the Outpost Still Standing
Start with the fact that shapes the next hour: the extractor does not go home with you. Its item card says teleport: no, and the wiki's fine print — that it cannot be teleported "without a Portal stone" — is describing a capability you do not have. A Portal – Stone costs 10 Greydwarf eye, 30 Grausten and two Molten cores at a Stonecutter, and it becomes available soon into the Ashlands, a biome and a boss past where you are standing right now. There is no "I'll portal it back and sort it out at base." The thing travels by hand, by boat or by cart, and the shortest trip it will ever need to make is the one from the crate to the nearest Ancient Root.

So the sap operation gets built here, at the camp you just spared. A Sap extractor is 10 Yggdrasil wood, 5 Black metal and the extractor itself, put together at a Workbench and placed directly onto an Ancient Root. The Yggdrasil wood is local — you cut it with the black metal axe you already needed to get into this biome — and the extractor is in your pack. Black metal is the awkward line, because it does not go through a portal either, which means the same logistics problem the extractor has. Bring it in by boat on this trip, or do what the wiki suggests and make it on site: the Mistlands is littered with Ancient swords and Ancient armour that mine for scrap iron, and a Blast furnace turns that into black metal without a sea crossing. Either way, plan it into this visit. The cart route was a single portal hop with no metal haul; the eitr chain is not, and crossing the biome twice for 5 black metal is a bad afternoon.
Pick your root by its glow. Ancient Roots push a green light through the mist — the most reliable landmark in a biome that hides everything else — and hovering one tells you what is inside it. "Pulsating with energy" is a full root, 41 to 50 sap. "The glow is fading" is 5 to 40. "Seems all dried up" is under 5, and is not worth an extractor. Once placed, the extractor pulls 1 sap every 60 seconds, holds a maximum of 10, and glows green whenever it has anything in it, so you can read it from across the camp. It has 100 durability and is immune to poison, spirit, chop and pickaxe, so it survives being ignored. There is exactly one way to lose sap you have already collected: destroying or deconstructing an extractor with sap inside does not drop the sap. Empty it before you move it, every time.
The reason to care about which root you picked is the refill rate, and it is genuinely slow. A root's reservoir regenerates 1 sap per 400 seconds, to a maximum of 50 — a full 50-sap refill is 20,000 seconds, better than five hours of world time. Your extractor drains that reservoir nearly seven times faster than it fills. Multiple extractors can share one root, but they are drinking from the same 50, so a second extractor on the same root empties it sooner rather than yielding more; the wiki's own advice is to move extractors between roots. That arithmetic is the entire argument for owning more than one extractor, and it is worth holding onto for the end of this section.
A full root, though, is more than enough for the first pass. An Eitr refinery costs 20 Black marble, 5 Black metal, 10 Yggdrasil wood, 5 Black core and 3 Sap, built at a Workbench on flat terrain or a stone floor. Every one of those inputs has a non-Dvergr supplier you have already visited: marble out of the Giant remains in the pit — which, with the Ward down, you can finally put a pickaxe into — black cores out of the Infested Mines you cleared for fragments, wood off the shoots, and the sap out of the extractor you just planted. Feed it and filling both hoppers consumes 20 Soft tissue and 19 Sap to produce 20 Refined eitr — the twentieth sap survives the rounding — with each sap burning as 40 seconds of fuel and a full tank running 800 seconds. So one full root covers the refinery's own 3-sap build cost and two complete loads with room left over. One caution about where you put it: a running refinery throws off the same lightning and poison discharges that dropped eitr does, and while black marble floors, walls and pillars shrug those off — as do iron and copper cage pieces — plain wood and ordinary stone do not. Do not build it in a wooden shack you like.
Five of that refined eitr goes straight into the Galdr table: 10 Black metal, 20 Yggdrasil wood, 5 Black core and 5 Refined eitr, under a roof with 70% cover. That table is the only thing in Valheim that assembles the Sealbreaker from the 9 fragments you pulled out of the mines in their blue-lit glass cases — and here is the first fact that catches people out. The Sealbreaker is not consumed on use. It is a key, not a sacrifice. You build it once, you open the runic Dvergr vault with it, and it is still in your inventory afterwards. The second surprise waits on the other side of that door: there is no altar to feed and no summon to prepare, because the Queen is already alive and roaming inside the Citadel. Every other Forsaken makes you assemble an offering and call them out. She is simply in there. The Hive seat altar only matters after a first kill, when re-summoning her costs three Seeker soldier trophies — which come off Seekers, like everything else in that building.
The Citadel itself has a small parting gift that fits the run. Beside the staircase on the exterior there is a damaged wood wall you can break or deconstruct, and behind it is a lower floor full of Dvergr furniture, a lantern, a stool and three Dvergr barrels — each barrel giving a Copper scrap, a Finewood and a Tasty mead, with the chairs and tables and shelves giving copper scrap and wood, and seven spots where a tankard can spawn. There is no Ward there and no Dvergr. It is an abandoned fortress, and it is the one place in the biome where you can swing a hammer at Dvergr property and nobody arrives to discuss it.
Trace the whole thing back and nothing in it required a dead dwarf. The light on your belt came off Yagluth — a Torn spirit into a Wisp fountain, a wisp and a silver into a Wisplight and ten metres of clear air. The black cores and the nine Sealbreaker fragments came out of Infested Mines, which are Seeker dungeons with no Dvergr in them at all. The extractor came out of a crate a cart broke. The sap comes out of a root that belongs to nobody. The soft tissue comes out of a dead Giant that has been lying in that pit since long before the camp was pitched around it. The marble comes out of the same Giant, or a ruined viaduct. And the refined eitr, the Galdr table, the Sealbreaker and the door all come out of your own bench.
Which is where the thing you were told to ignore comes back. The refinery is running, so refined eitr exists now — and the eitr trick, ruled out earlier for being circular, was never wrong, only out of reach. It was the second-extractor tool the whole time, and you have just become the player it was written for. The next component crate you find does not need a cart, a lane through the sharp stakes, a slope, or a run-up. It needs patience and a handful of eitr, which is exactly the tool for a crate sitting on top of a wagon or up a Lighthouse staircase where no cart was ever going to reach.
And it is worth noticing whose tool you borrowed. The Dvergr are the ones who sealed the Queen away in the first place and scattered the key fragments across the world, and their mages spend their days muttering "I swear we had a spare Extractor here somewhere…" and "We built these mines, you know? And now look at us…" You took a jailer's spare part to open the jail, and this is the only version of that story where the jailers are still standing behind you to complain about it. So finish it properly: before you leave this outpost, put the Sap extractor on the nearest root that is still pulsating, and come back for it once it has had time to fill rather than merely time to glow. When the first refined eitr comes out of that refinery, spend it on the crate at the next settlement. The cart has done its one job, and every extractor after this one costs nothing but patience — and leaves another camp with its lights on.